
Premise
My uncle asked me to install this tesla auto frunk kit on his model Y. The instructions and videos online do an ok job (I followed this video) with helping you along the installation process but are not as concise as I would like. Here I will cover my own installation experience with images and advice to help you have a smooth installation also for my own future reference if I decide to install another one of these kits.
Preface
Currently this ‘guide’ is lacking a lot of pictures and step by step information I would like it to have due to my lack of taking them during the installation process. If I install another one of these I will make sure to fill in the gaps which are left and cement this as a concise written guide. Until that is done this preface will remain here.
I’ve actually found that the instructions that they provide on their website are much better than what is included in the box. I recommend you check that out for more information and images.
Included
In the box:
- 2 power struts
- 2 Ball joint plates
- Computer unit
- Automatic latch
- Suction pump
- Wiring harness
Prep
Before we can remove the oem struts we need to make sure that the frunk is secure. I used a curtain rod to keep the frunk open, but you could use any sort of stick as long as it is the right length. The curtain rod is convenient because it is adjustable. You may want to tape the top of the stick to the top and bottom of the frunk for extra stability.
OEM Struct Removal
Now the first thing you need to do is remove the oem struts. The easiest way to do this is to unscrew the ball joint from the chassis on the bottom end as opposed to popping the strut off of the ball joint and pop the top end of the strut off of the ball joint. You can do this with a small flat head screwdriver that you wedge into the ring on the top end of the ball joint.
Power Struct Installation
Once the oem struts are removed you can install the power struts. This is a similar process to removing but in reverse as you might expect. You have to install the ball joint plates on each side. The plates are labeled left and right in the frame of reference of the driver of the car. Installing them is pretty straight forward. They only fit one way so you can not mess it up. Use the included bolt and a hex allen wrench. If you have a micro ratchet it makes the job a fair bit easier. Repeat for both sides then install the power struts onto the bottom ball joints. This may be a bit awkward but it does not take that much force to seat the strut onto the ball once you find the right angle. Then seat the top of the power struts onto the ball joints. At first I found this to be very difficult, but after lowering the height that I had the frunk at the ball was better lined up with the hole and the strut seated no problem.
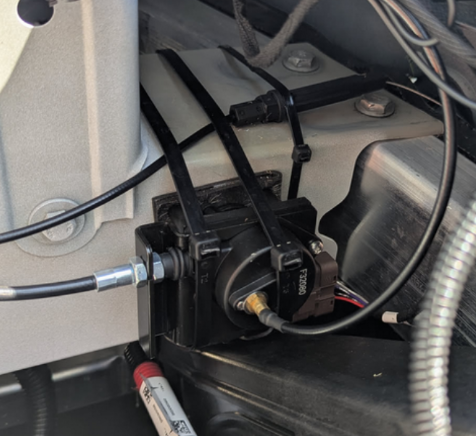
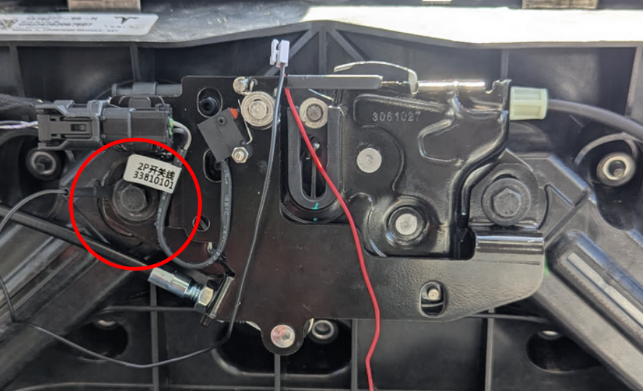
Automatic Latch Install
Now it’s time to install the automatic latch. First you have to remove the oem latch and you will need to use a piece from it in conjunction with the automatic latch. This is kinda the most difficult part because it has a few different pieces working together and it is not clear where to put all of them. What I ended up doing was installing the automatic latch as you would expect and zipting the suction motor to one of the main beams of the frame with some of the double stick foam that comes with the kit to prevent vibration while driving. I also secured the emergency pull line in the same way.
Finishing Touches
Last thing is to wire everything up and test it and once you confirm that everything is working, cable manages everything. Here is also when you would want to choose the speed of the automatic frunk. Press and hold the button and you will hear beeps rising in amount and frequency from 1-5 ,1 being the lowest and 5 being the highest.
I also installed this frunk light kit which was fairly simple but I found that this bolt on the frunk latch worked as a ground but one of the other ones did not and thought it was worth mentioning.
Closing Thoughts
Lastly I had some trouble with the hood of not being flush to the rest of the body when the frunk was closed. First make sure that the automatic latch is level and straight, then you can use the two rubber dials on either end of the front of the bottom of the frunk to adjust the height when it is close. I found that I got all these adjustments and good as I could and the hood was still not flush with the rest of the body but once I reinstalled all of the trim pieces it was magically flush. I imagine this is just a cheap Tesla manufacturing quark.
In conclusion this kit is fairly easy to install if you follow the instructions and have the right tools. The most confusing part is figuring out where to put everything once it is installed.